Handling social media posts is easier when it’s a group effort, so ClickSocial allows you to add additional members to manage publications. Each member can have different permissions depending on their role. Here’s how to set up a new member.
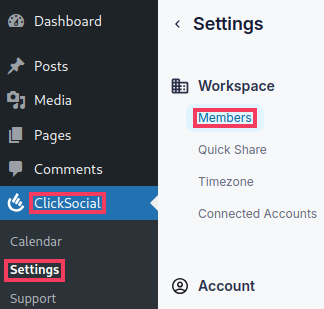
- Log into your WordPress Dashboard and go to ClickSocial > Settings > Members

- Start typing the user name or email address of the WordPress user you would like to add. When the user appears in the autocomplete dropdown, select the user and click Invite

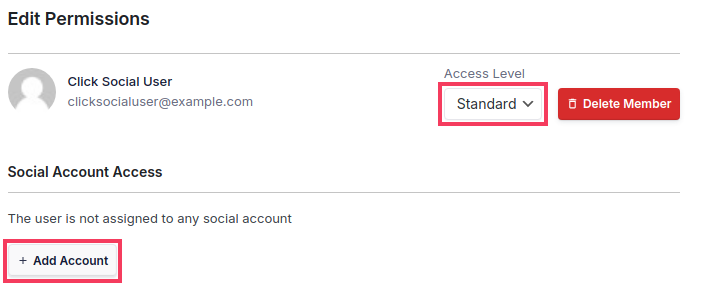
- By default, the member will be added as a Standard user without access to any specific social media accounts. To adjust their permissions and social media account access, click the ellipsis on the right side of their listing in the members list.

- From here, you can edit their Access Level if they should be an administrator or you can click Add Account to give them permissions on specific social media accounts.

- For Standard members, after clicking Add Acount, click the Add Permission button on any social media accounts they need access to.

- By default, the member will be given “View Only” access to the social media account, but you can click View Only to see the dropdown and select a different permission level.

- Repeat this process for any other accounts the user needs access to
For more details on the available access/permission levels, see our guide here: Understanding Member Access and Permission Levels
